Watch Quick Start Video
Quick Hands Hockey – Recommended Setup
Quick Hands Hockey is designed to work with minimal equipment, but using the right setup will give you the smoothest gameplay, lowest lag, and best tracking accuracy. Three important things to know:
- Green tracking puck works best for accuracy. (Green Biscuit)
- HDMI Phone adapter reduces lag
- Set your tracking area and puck color in the pre-game window
What You May Need:
Device mount to aim your phone at the playing surface:

ANXRE 71″ Phone Tripod, NT79 Extendable Selfie Stick
Tall adjustable tripod with phone & camera compatibility — perfect for video, selfies, meetings, and content creation.
View on AmazonA Green Biscuit is preferred for optimal tracking:

Green Biscuit GRE-GB Original Training Puck
Durable training puck designed for smooth indoor practice and improved stickhandling skills.
View on AmazonPhone video adapter (older I-phones with lightning connector require a different version). You can also use Apple screen mirroring to connect with your TV. HDMI connections are preferred to minimize any potential delay.

USB-C to HDMI Adapter with Charging Support
USB-C to HDMI adapter for phones, tablets, and laptops — supports video output while charging. Works with many iPhone/Android/USB-C devices.
View on AmazonYou may also need the following items:
- HDMI Cable
- Synthetic Ice Surface
Basic Setup

At minimum, you need:
- A smartphone (iOS or Android)
- A hockey stick
- White synthetic ice surface.
- Hockey Puck – Black, Green, Blue or Orange.
- A small clear training area near a TV.
This setup works well for casual training and quick sessions.
Recommended Setup (Best Experience)
1) Phone on a Tripod (Strongly Recommended)
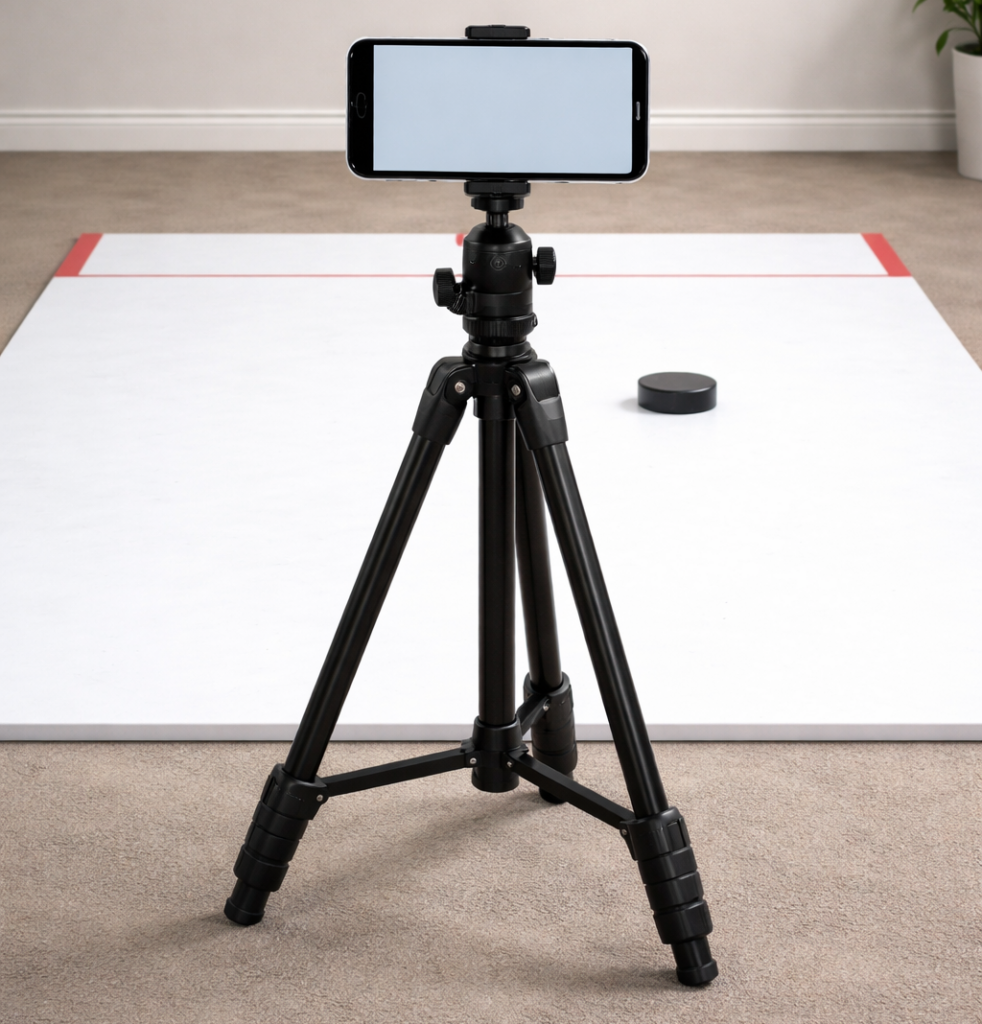
Mounting your phone keeps tracking stable and improves accuracy.
What to look for:
- Adjustable tripod (tabletop or full height)
- Phone clamp with a firm grip
- Adjustable tilt angle
Why it matters:
- Reduces camera shake
- Improves puck tracking
- Keeps the phone safely out of the play area
Placement tip: Position the phone 2-3 feet (in front )from the closest edge of the playing surface, angled slightly downward toward the training area from about 2 feet height.
2) HDMI Adapter (TV or Monitor)

For the best experience, we recommend hard-wired HDMI output instead of wireless casting. HDMI provides a more responsive “arcade” feel for reaction-based drills.
Recommended options:
- USB-C to HDMI adapter (most Android phones & newer iPhones with USB-C)
- Lightning to HDMI adapter (older iPhones with Lightning port)
Why HDMI is better than screen casting:
- Near-zero input lag
- Smoother visuals
- No Wi-Fi interference
- More consistent gameplay timing
Note: Wireless screen mirroring (AirPlay / Chromecast) may introduce lag and is not recommended for timing and reaction games.
3) External Display
Using a TV or monitor gives you:
- Larger visuals
- Easier focus during fast drills
- Better group or coaching sessions
Any modern TV or monitor with HDMI works. You will not be able to see your phone screen while playing the game.
Training Area Setup
- Clear a space roughly 4 ft x 6 ft (more space is always better)
- Use a flat surface for consistent puck movement
- Indoor or outdoor setups both work
- Avoid strong glare or direct sunlight into the camera
Lighting Tips
- Even lighting works best
- Avoid harsh shadows across the puck
- Overhead room lighting is usually ideal
- Orange lighting will cause tracking issues tracking an Orange puck.
Common Setup Mistakes to Avoid
- Phone laying flat on the floor
- Wireless screen casting with noticeable delay
- Camera too close or too far from the puck
- Phone in the direct line of stick movement
Quick Setup Checklist
- ✅ Phone mounted securely
- ✅ Camera facing the training area
- ✅ HDMI adapter connected (optional)
- ✅ Stick + puck ready
- ✅ Clear space
Final tip: Start simple. Once you’re comfortable, add the tripod and HDMI setup for a much more responsive experience — especially for fast reaction and timing games.